
This is the first part in a series that will chronicle how I make a RakeMaker II.
Handle making begins with stock selection – dry, straight grained apple, cherry, and walnut. Since only small pieces are needed, I am able to use bits and pieces, drops from other projects. The handle in the following pictures is made of apple.
I begin with square stock that is about six inches long, which will yield three handles if I don’t make any mistakes. I use three measurements to define the shape: the largest diameter, the overall length, and the diameter at the base of the handle.

Handle blanks.

Squared up and ready to start turning.

Roughing the blank.

Maximum diameter and overall length marked on the blank.
I use the three tools shown below to turn the handles. I am not really a woodturner, so take what you see below with a grain of salt. I have learned a couple of things along the way, though.
- Sharp, light cuts work best for me, especially in dry wood that is unsupported at one end.
- Profiles are easiest to reproduce when the shape mirrors that of the tools used for turning.

The three tools I use.

Rounding over the end.

Turning the base to its diameter.
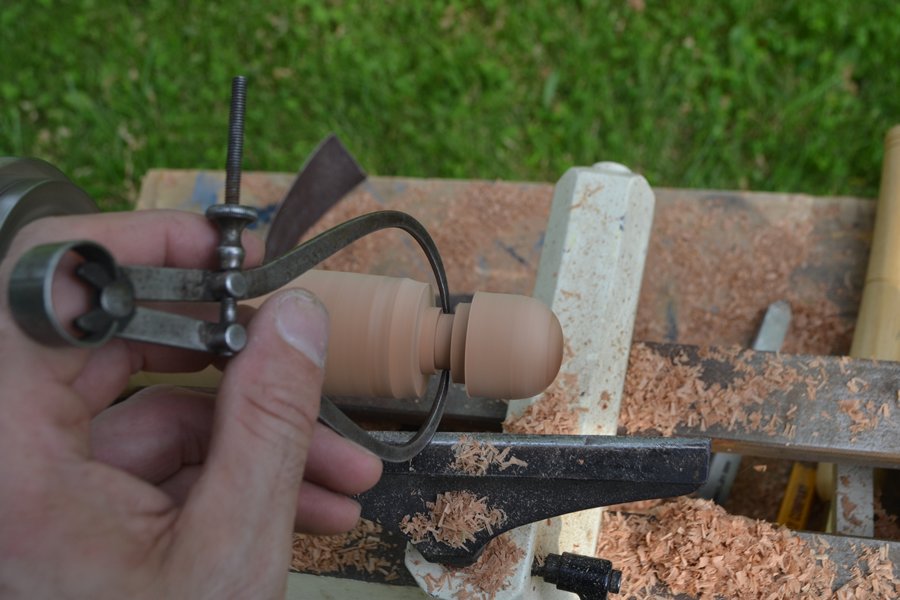
Measuring the diameter of the base.

Turning the profile at the base of the handle. Notice how the profile of the tool matches the handle.

Finishing up the profile.

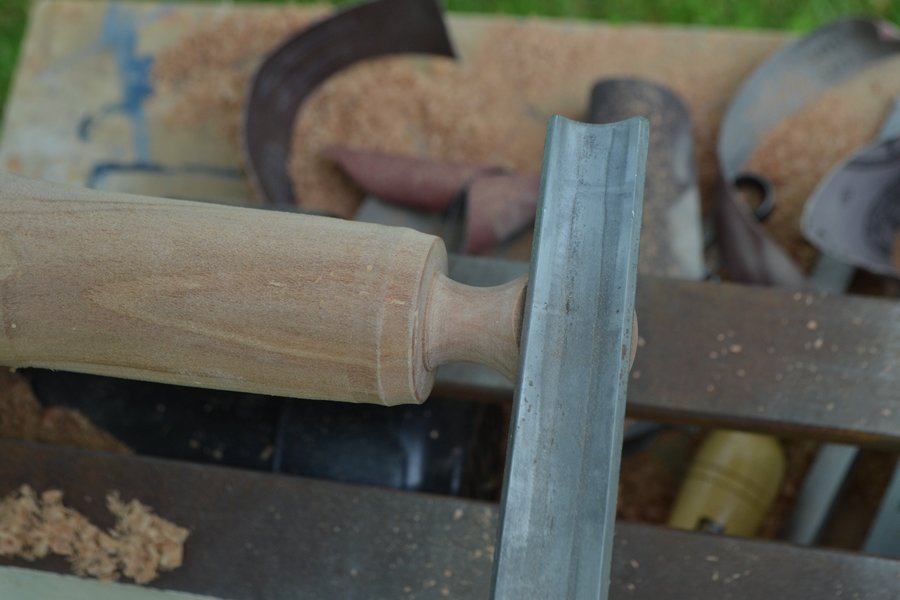
The roughed out handle, ready for sanding.

After sanding the handle I turn the grooves.
After the lathe work is done, the finger grips need to be shaped. Any half round file or rasp will work, but I use milled tooth or Vixen files. they cut fast and leave a clean surface. I have also used a Liogier rasp for this task, and with great success.
Shaping the finger grip.

I use an Iwasaki milled tooth file to shape the finger grip.

Finger grips shaped.

Drilling a thru hole for mounting the handle to the body.

Parting the handle off. I undercut the base slightly so that it will fit tightly to the body.

I finish removing the handle with a saw. I’ve had bad luck trying to part it off all of the way with the chisel.

Just a little cleanup needed after cutting the handle off.
Turning the handle, as hard as it may be to believe, is the single most time-consuming part of this saw filing guide. But it is very comfortable in the hand, and I think it looks pretty good on the tool.

The completed handle, ready for finish.
Hey Isaac. I just realized that you had a blog. I’ve visited your website many times but it’s nice to see you have started a blog also.
It looks like a lot goes into those RakeMaker II handles, as I’m sure with the rest of the tool too. I can hardly wait to get my hands on mine.
Jamie Bacon
Jamie, They are getting close to shipping. Just waiting on one final part to arrive. Keep an eye out here for an update.
Isaac
Just got my RM II and it has made THE difference for me. My problem has been “consistency” in maintaining the rake & fleam angles. I’ve tried every thing I could find and even with the RM I, I would find myself straying but not so with this Lil darlin. Just used the new RM II on 2 of my saws but that is enough for me to realize there is very little way to go wrong. Great for my confidence. Thanks Isaac!!