No other ratcheting brace is more highly sought after than those made under the “Yankee” name. The liberal use of ball bearings, the concealed ratchet, and rugged construction all leave a most favorable impression on the user. Use one that is in good condition, and you will be spoiled for life.
Originally made and sold by The North Bros., these braces feature the mechanical elegance and simplicity for which the firm was justly renowned. When Stanley acquired the company in 1946, they continued to make the brace with only minor changes. This brace is one of those made by Stanley.
Like so many other “Yankee” braces, this one was made expressly for Bell Systems, who valued their rugged, sealed construction. Earlier models are substantially similar. If there is one weak point in these tools, it is that the grease in the sealed ratchets dries out and hardens after a few decades. In many, the grease will be so stiff as to completely freeze the ratchet mechanism. Fortunately, the time and effort needed to clean and regrease the ratchet and pad is not great.
Although the 2101 and 2101A models are far more common than the 2100 and 2100A, there is little difference between the models. To the best of my knowledge, the difference lies in the plating: the 2100’s are chrome plated, while the 2101’s are nickel plated. In 1958, that chrome plating commanded a 20% premium (page 66 of the 1958 Stanley catalog).
A word of warning before starting: while much of the construction remained essentially unchanged over the years, there are some differences. On older braces, I believe that the cladding and bearings on the end handles were peined into place. Disassembly of this requires modification of the brace which may or may not be worth pursuing. If you run into this, or other differences from what I have shown, consider taking pictures of the disassembly process. It takes time to do this, but makes it much easier to put everything back in its proper place.
Without further ado…
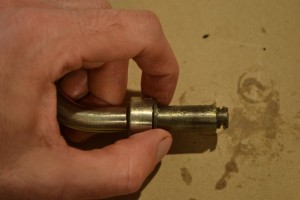
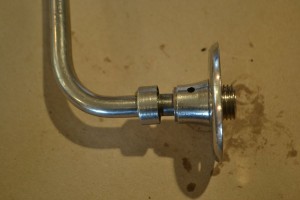
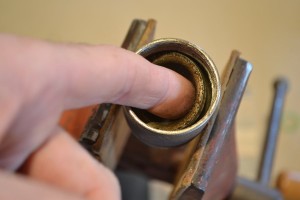
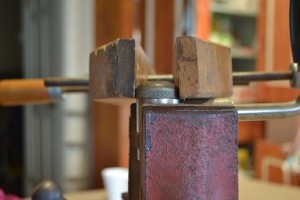
Let’s start with the head. Begin by removing the two or three screws on the underside. The plastic or composition handle is threaded, so after these screws are removed, it will not simply pull off, but will need to be turned counterclockwise (looking at it from the above, as if you were holding it to use). Occasionally, these threads will be a little sticky. If this is the case with yours, hold the collar of the metal cladding in a wooden handscrew or vise (pad the jaws of your vise to prevent damage to the plating).
Once the head is removed, you will see a C-clip that holds the cladding and bearings in place. (ab)Use a screwdriver to remove this clip, then lift off the cladding. This is best done with the brace in the upright position so that the now exposed ball bearings don’t make a dash for freedom (hard to blame the little buggers, though – who wouldn’t want to explore the world after toiling away for decades in a confined space?). The bearing cup, races, and bearings can now be removed from the handle and cleaned.

With the cladding removed, the ball bearings are exposed. Actually, there is an upper race between the cladding and the bearings, but this often sticks to the cladding when you remove it.
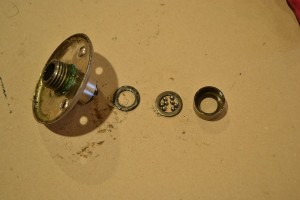
Most of the parts before cleaning (there are a few bearings that didn’t show up for the class picture).
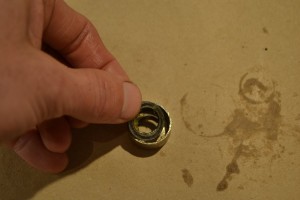
Reassembly of the pad is simple, so long as it is done in the correct order. The bearing cup goes on first, followed by a bearing race (flat washer). Next, install the grease and bearings. If you give the race and cup a good coating of grease (I use axle grease), the bearings will stay where you stick them. If you managed to lose some of the bearings along the way (there should be 16), take a deep breath and visit a good hardware store and ask for 1/8″ bearings there. If you can’t find them locally, you can order them online. The other bearing race goes on top of the bearings, followed by the cladding and the C-clip to hold everything together. Finally, screw the pad on and reinstall the two or three small screws from below.
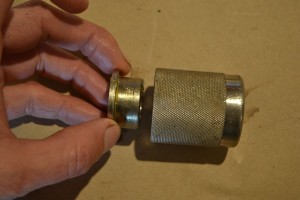
With the pad done, it is time to tear into the shell (the assembly that houses the jaws) and ratchet. Begin by unthreading the shell completely. No tricks here; just turn until it falls off.
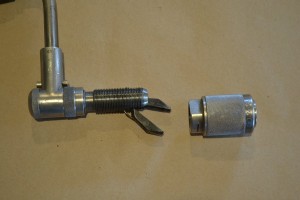
Unscrew the shell from the rest fo the brace. This is the easiest part of the entire process, so don’t feel too smug yet.
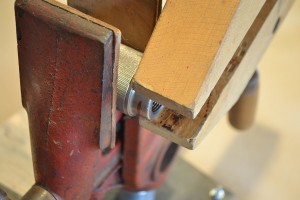
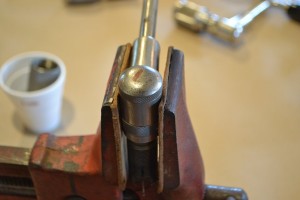
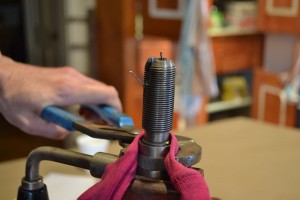
Hold the shell in a handscrew or padded vise jaws and use a wrench or handscrew to remove the end cap. This usually requires little effort. The threads are a standard right hand form.
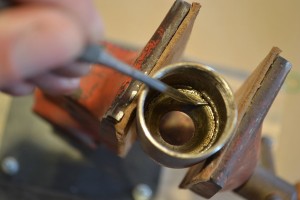
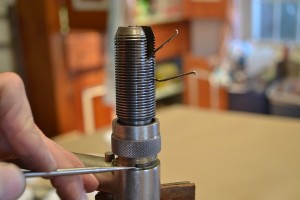
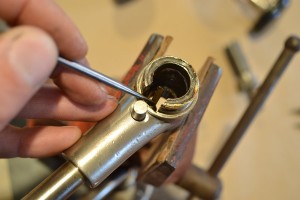
With the cap removed, look down into the shell, where there is an internal spring clip. This clip needs to come out so the cone shaped race and ball bearings can be removed. I use a machinist’s scribe and pick to remove this clip. Patience and persistence are your friends in this step. With the clip removed, the cone race can be removed. Remove carefully, as the ball bearings (there are 31 of them in there) beneath it are no less eager to taste freedom than were those in the head. Remove the bearings and the thrust washer below them.
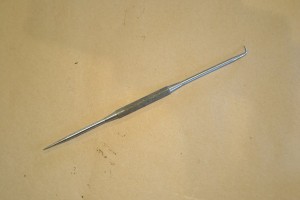
A machinist’s scribe and pick is an invaluable tool for this and many other tasks. Just be careful, or you’ll put your eye out, kid.

There are 31 ball bearings beneath the cone race. Remove these carefully to avoid losing any of them. You will pay dearly for them if you need to buy them at a hardware store.
Clean, grease, and reassemble.
Now that you are warmed up, it’s on to the ratchet. This is the most challenging work, but very doable. Pay close attention to how things fit together, and take pictures to help you remember the proper order and orientation.
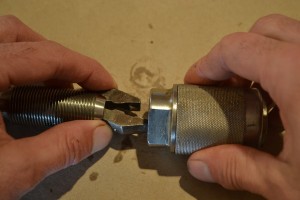
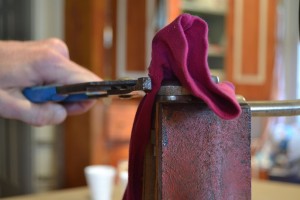
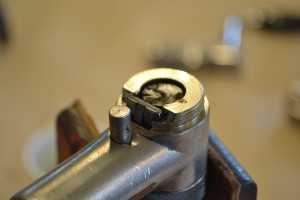
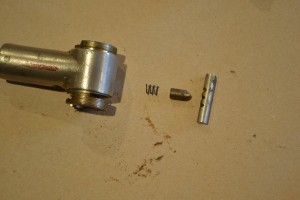
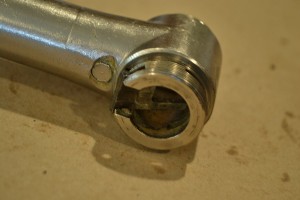
Begin by removing jaws, then the cap on the end of the ratchet housing. Once again, use wood handscrews or padded jaws to do this. The cap has right hand threads, and usually comes off easily. Use a pick to remove the exposed pawl.

Remove the jaws. I’ve never had much luck removing the spring, and just leave it in place. It is easy to clean around.
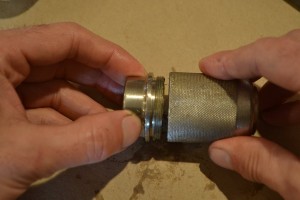
Now turn the brace over to work on the other end of the ratchet housing. Remove the knurled collar using – yes, you guessed it – either a wood handscrew or paded jaws. With this collar unscrewed, use a pick to remove the clip that is now exposed, then lift out the entire shaft and collar.

Now the ratchet shaft and collar can slide out of the ratchet housing. There should be no resistance.

This is what you will often find. The green grease has dried out and hardened. With the grooves filled in, the ratchet function does not work.

If a brace has seen heavy use, there may be some burrs on the edges of the ratchet grooves. These can be removed carefully with a fine file.
Now push the ratchet selector down (towards the head) and remove the second pawl. With both pawls removed, the flat spring will slide out.

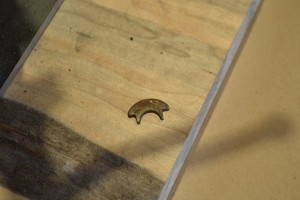
Because of the way it sits in the housing, the second pawl cannot be pulled straight out. Pivot it first, then pull it out.
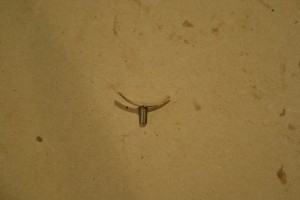
The spring shoul have a nice even curve to it. If it does not, it is usually possible to bend it gently. Gently.
Finally, remove the ratchet selector by pushing it in one direction or the other. Once this is out, the spring and pin are free to fall out.
Reassemble after cleaning and greasing everything. Again, I use axle grease here. Reassembly of the pawls and springs is a little tricky. Not complicated, but you will often wish for a third and fourth hand to hold everything in its proper place. Take your time and don’t force anything.
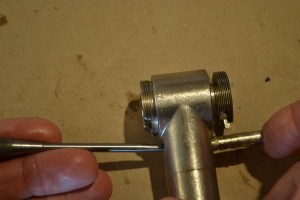
After cleaning and greasing, reassembly starts with the ratchet selector mechanism. After installing the spring and pawl, slide the ratchet selector in. Use a pick or slender tool to hold the pawl back so that the end of the selector can slide past it. The three grooves need to face the pawl.

Use tweezers to put the spring in its place. It is symmetrical, so don’t worry about putting it in backwards.
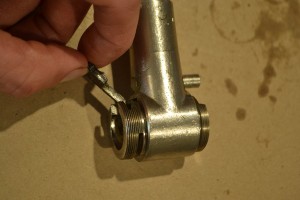
Install the pawl on the lower end of the housing. It needs to enter at an angle. Be sure that the square-shouldered groove faces the spring (the spring rides in this groove). The two pawls are identical, so don’t worry if you forgot which one came from this end.

Slide the shaft into the housing. Make sure the collar is on the shaft, and facing the correct direction.
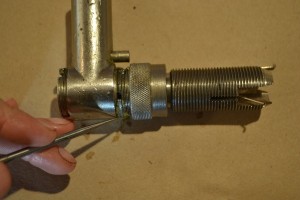
Replace the retaining clip, then thread the collar back onto the housing. The upper pawl can now be replaced. It will be necessary to use a pick to pry the spring away from the housing to provide clearance for the pawl. Make sure that the spring rides in the square-shouldered groove.

Replace the ratchet housing cap, and snug this and the collar up. Do not overtighten them. Replace the jaws and shell.
And here is the completed brace.

















So informative. Thank you so much.
Although I don’t own a yankee brace, I have very reputable one made by peugeot & frères back in the early 20th. It’s such a marvel to use! However I have a minor glitch with the swipe handle that is cranky, it doesn’t turn freely, it’s kind of ratcheting you know. Could you please enlighten me on how the handle is mounted on these kind of brace? and is there a way to disassemble it? Thank you for your help.
I don’t think you will be able to remove it without cutting or destroying it. It seems that on most of these braces, the sweep handle was put onto the frame before it was bent, and it becomes a permanent part of the brace.
I believe there were a few braces that had adjustable stops to reduce axial play, but most of them did not. If you’re lucky, there may be some oil or grease in there that has dried out. I’d start out by trying to get some solvent down there, or even just some oil. Work it around and see if that frees it up a bit.
Good luck!
Isaac
Thanks Isaac !
Thanks – but I’m still looking for a good brace of this type.
Your pictures raise a different question – the vise you use has very tall, thin jaws — my neighbour has an ancient iron leg vise with similar jaws — do you (or any of your readers) know what trade or speciality used this type of vise? I cannot see this type of jaw in any catalogue or web-search I have done.
Best regards
danny
Danny, the Gyro-Vise or Versa-Vise is often sold as a gunmaker’s or luthier’s vise. Never having engaged in either practice, I don’t know how accurate that is, or for what tasks they are used. I imagine that patternmaker’s may have also found them useful.
So far as I know, there is no modern maker of this particular style. Shop Fox makes one with shorter jaws. They call it the Parrot Vise.
Regards,
Isaac
also similar to black smiths vice
Really excellent post! I have one of these and I’ve been looking around for advice about how to perform this kind of overhaul. This is the best piece I’ve seen, by far. Love the thorough detail and lots of photos.
Thanks for making the effort to put this together.
Eric
Eric,
Glad you like it, and hope it helps you if you take it on. It’s really not too bad as long as you take your time and pay attention. And never force anything.
Isaac
I just finished overhauling an non-functioning 2101A Bell System brace (the green goo had turned rock hard) and these instructions were really helpful and easy to follow. Great job with the instructions and photographs and thanks for posting this!
Tom, Glad to be of some help. That green grease doesn’t work so well after a while. I hope that you enjoy using the brace for many years to come.
Isaac
Hey Isaac,
Great post! I also just got my first 2101A. It’s ratchet has definitely seen better days, as has the brace. I’m definitely feeling inspired and will be following your instructions in the coming days. I really want this brace to look as good as I hope it will perform. The handle and top nob are fairly beat up but not in terrible shape. The metal on the brace itself contains some scratches and surface rust.
I’m wondering if I can just soak the entire brace in vinegar? Do you know of a good way to clean up the plastic?
Thanks!
Hi, Connor,
I sanded the plastic to 320 grit, then wiped it with painter’s solvent on a paper shop rag. It takes off a layer of plastic. The plastic reamalgamates when the solvent evaporates, and returns to its original shine.
Thanks for that tip, Connor. Does your brace have the black plastic handle, or the earlier brown composition one?
Isaac
Great Job, I just bought a 2101 and want to restore it, lumberjock has a good restore blog, but not how to take all the way apart… thanks for the pictures and step by step.
Jerry
I just bought two North Bros braces with the same “issue”. The button works when it is in the “IN” position, but when I push it in the other direction — nothing. Also, halfway in — nothing. Otherwise all in good condition. Am I missing something?
I’d hate to do a complete overhaul only to find that I forgot to touch second base. (That happens to me a lot.)
Jeff, it sounds like the grease in there has dried up and is keeping the pawl from moving the way it was meant to. You may be able to remove the cap from the assembly and get enough solvent and new lubrication in there to get everything moving again. I haven’t tried doing it that way, and a complete disassembly would be my preferred method of dealing with it. Once you feel how smoothly everything operates after that, you’ll have no regrets whatsoever about it.
Isaac
Thanks for the how-to. I had a sticky 2101-10″ brace and found no lubricant, not even the dried up green grease.
I thought that was the problem but the small flat spring that pushes the pawls into the teeth on the shaft had a broken arm. The loose arm was jammed in the rachet housing making the whole think work very poorly. Luckily I didn’t try to force the rachet to turn and didn’t wear any of the innards. I made a new pawl spring from 1/8″ steel rod and a “balance spring” or flat tensioning spring for screen windows. It took a couple tries and a couple hours to get it right. Figuring out what to use for the flat spring was the tricky part.
Otherwise I cleaned everything, replaced the ball bearings, and lubed it up. Now it runs silently, the selector sticks nicely in position, and there is a very satisfying clicking noise as it ratchets. It is beat up, has some rust and flaked plating, but it works like new!
Thanks!
Rob,
Happy to be of some help! It’s always great to see one of these put back into use for another generation or two.
Isaac
Thanks so much for sharing how you replaced the spring in your brace.
You’re welcome, Marlon!
I just bought a 2100 and it is in decent mechanical shape. I know the 2101 and 2100 are very similar. the first difference I noticed is the 2100 has oil ports. As far as the innards go, do you know of any major differences? Also, which grease have you found to work the best, assuming I should grease the 2100?
I finally got around to working on my 2100. I am unable to get the ratchet cap off or the knurled collar. So, as a hail mary I filled the oil holes with penetrating oil. Now the ratchet works in both directions instead of just one. While this is great, I would feel much better being able to open it up and clean out the gunk. I am afraid of destroying the knurled surfaces trying to do this. Maybe a few days bath in the penetrating oil will help. Any advice for very stubborn threads? Usually I use heat on stuck fasteners but I am not sure that is the best idea here.
A good long soaking would be the most conservative.
Then a good long drain of the penetrating oil; it would heat up long before the metal.
There are grades of heat, the most gentle from hair driers. Heat guns are harsh. Try that repeatedly, but keep testing the results to the touch. If you can touch it, you haven’t gone too far. If you can apply, withdraw, apply, withdraw, that would be conservative.
A thermometer might help you keep a small record, either the touch type or one that takes a reading from a short distance. My 2 cents.
The only other thing I have experience is that if you ruin the tool, you’ll still be alive, right?
It turns out the soak in penetrating oil overnight worked. Everything was very clean inside. Only a slight amount of gunk which the oil loosened. I don’t think mine ever had grease in it which is very helpful. I plan to oil regularly and occasionally flush with penetrant. That should keep things free for a long time.
Nick, sorry I didn’t have a chance to respond earlier, but looks like Jeff gave you some solid advice (thanks for stepping up, Jeff!). Glad you got it off, and I’m sure you’ll enjoy using it for many years to come.
Isaac
Hi Isaac! Great piece. I hope this question finds you well, considering the original post is a couple years old (though I think it will continue to have relevance as every single one of these braces should be preserved!) I was fortunate to find one in perfect mechanical condition, though I’m now starting to see some of the signs of the grease seizing up – something I’ll address soon. One issue I hope you’ll have some experience with is cosmetic. Have you found a way to restore the rubber (?) pad and handle from an oxidized state? I’d imagine a light abrasive or polishing compound would do the trick, but I’m not confident enough in that answer to try it our if someone else has a better way. Thanks!
Nathan,
Thanks, and I think you’re on the right track. I’d start off with either a bit of AutoSol or paste wax, and rub that on with 000 or 0000 steel wool. It would be hard to do any damage with those materials, and you can always move on to more aggressive methods if they don’t work. But usually paste wax goes a long way towards renewing a bit of the shine.
Isaac
I really just wanted to thank you for taking the time to post such a complete and thorough ‘how to’ on this subject. It made refurbishing mine a breeze. Without it I’m sure I would have broke it and/or sold it for parts. Now I have a ‘like new’ fully functional 2101A in my toolbox thanks to you sir! ;o)
Thanks, Sam! Just glad to be of some help in keeping another one of these going strong.
Isaac
Great write up. It helped me get my recently purchased Yankee apart… mostly. There is some serious rust inside the one I got. I can’t get the chuck apart to pull the race out, can’t get the palm handle off and can’t get the spindle handle to turn at all. Is there any way to remove the spindle handle? Hoping some Break Free will eventually loosen the chuck and palm handle. Vinegar bath took most of the surface rust off.
I don’t think there’s any way to remove the spindle handle off short of cutting it off. Probably best to soak it in something like Evaporust and keep trying to turn it. Perhaps clamping the handle in a vise and twisting the arms will be enough to break it loose. I’d just be careful about what you soak it in in case it softens or eats the rubber or plastic away.
Isaac
I recently purchased a pre-Stanley 2101 brace. It seems to be in good working order, but I would like to disassemble it for cleaning. So far no luck getting any of the knurled parts loose.
My main concern is that there is about 1/16 inch of play in the ratchet. I feel the brace “rocking” back and forth ever so slightly during use. Is this amount of play normal?
Any suggestions on how to get this thing apart without wrecking the beautiful knurling on the threaded parts?
Philip,
In which direction is it rocking? Rocking in some directions is normal, and 1/16″ is not necessarily abnormal. There’s probably not much improvement to be made by disassembly and cleaning; that mostly just makes it operate more smoothly.
To free stuff up, you can try some kind of penetrating oil. Kroil works well, as does a 50/50 mix of acetone and transmission fluid. Apply it daily over the course of a week or two to give it time to really penetrate. Make sure you protect the knurling with wood or leather before trying to loosen it with pliers or a vise. It’s definitely worth protecting and cleaning it up!
Isaac
It rocks a bit from side to side at the bottom of the ratchet. Everything spins freely, and the ratchet works well in both directions, so I don’t really *need* to do anything to it. This is an early model brace with the oil ports so I don’t think it is packed with the troublesome green grease.
I let it soak for 5 days in WD-40 but things are still frozen.
I’m inclined to just leave it alone. I cleaned up the exterior with some fine steel wool and added some fresh oil and am happy!
I was thinking that if I could get it disassembled, there might be a place where I could add a thin shim to take out the play, but it’s not a big deal.
Thanks for this awesome and informative guide! I was successful with a complete tear down cleaning and rebuild. The most difficult part for me was removing the spring clip that retains the bearing race. Assembly was uneventful!