
This is the fifth entry in a nineteen part series that covers the construction of one of my saws from start to finish. For links to the other entries, please see the full chronological index. -Ed.
Cleaning up the nibs, beak, and horns
While the scroll saw is an efficient method of cutting out handle blanks, the surface left behind requires some refinement. I do this work with a chisel, a Vixen file, and sandpaper.
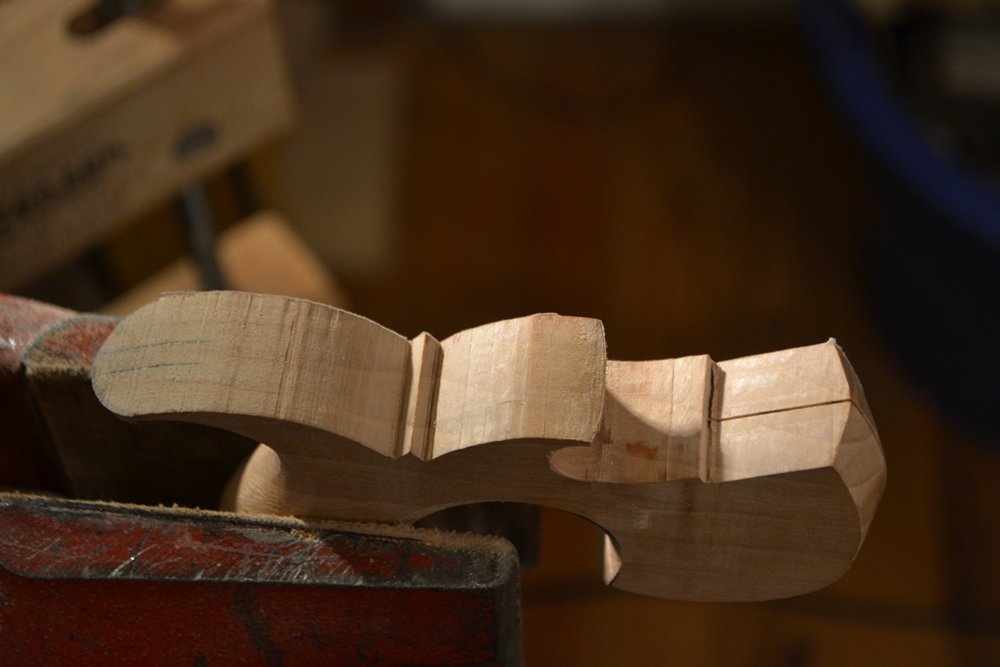
The surface left from the scroll saw.
I begin by cleaning up the nibs with a sharp chisel. This work requires a sharp chisel and careful attention to the direction of the cut. Since the tips of the nibs are end grain, they crumble and chip easily. Some woods will take a fine detail, and their tips can be left relatively sharp. Woods like apple, beech, and cherry fall into this category. Other woods, such as walnut, do not play so nicely and require more rounding over (which I do with sandpaper).
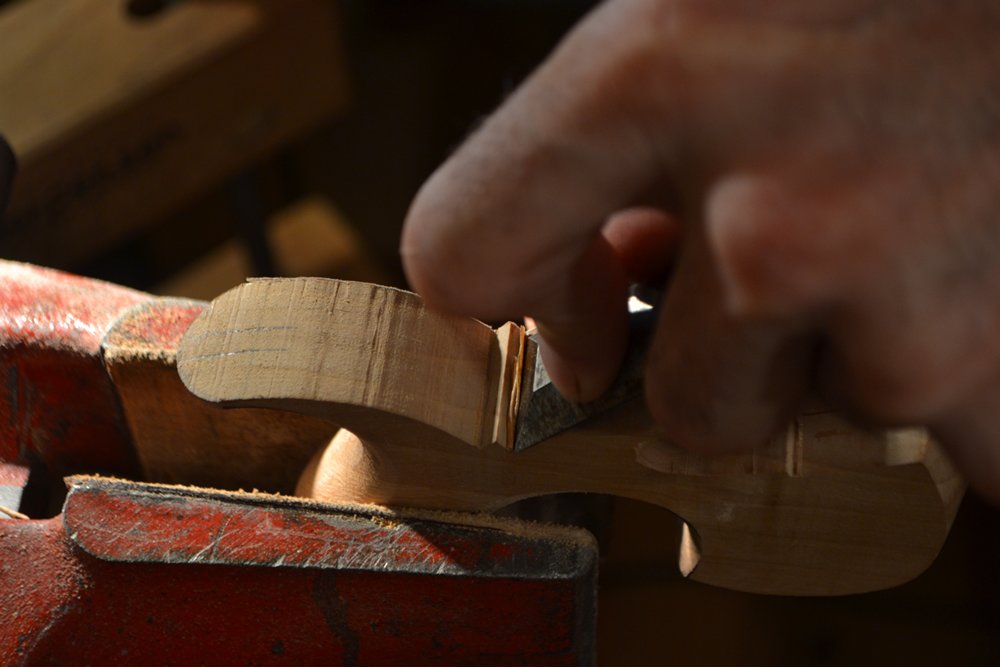
Begin by paring the 1/8″ immediately fore and aft of the nib.
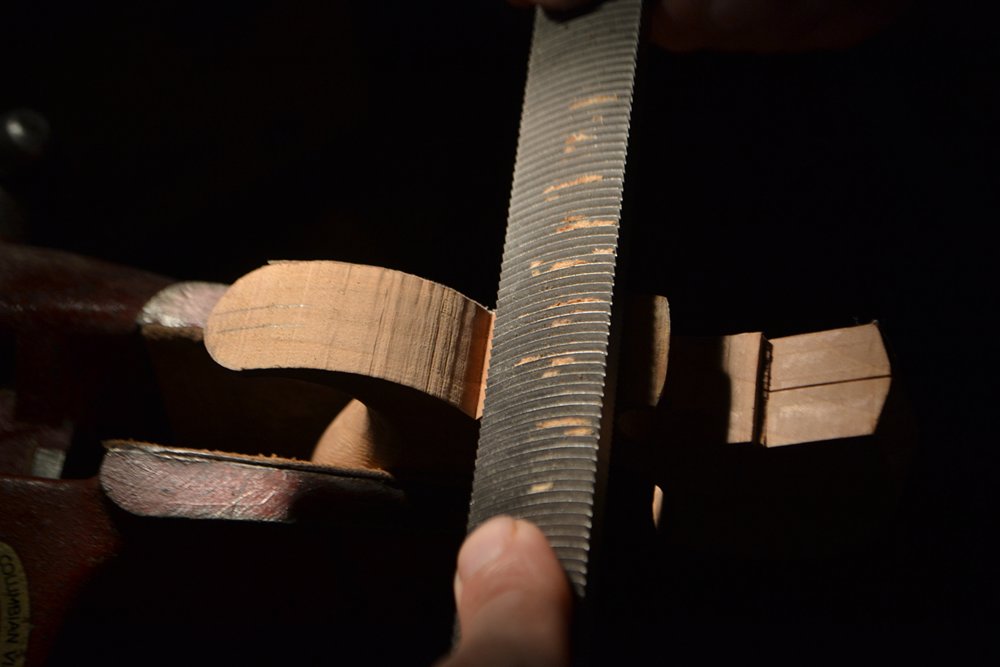
Pare the nibs – I begin by cutting across the grain…
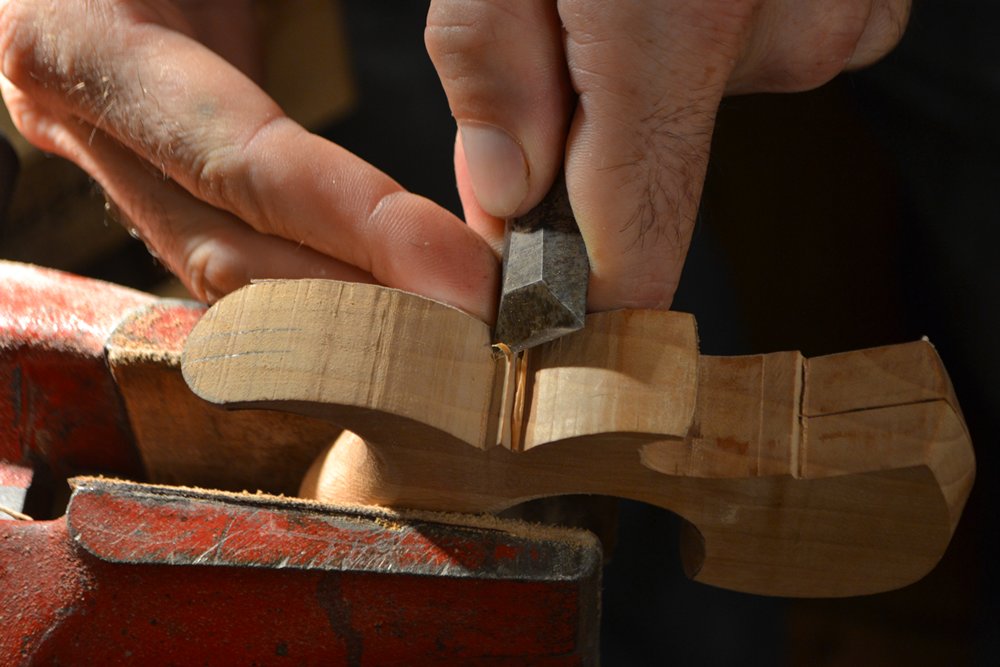
…and then finish by paring with the grain so that the surface of the nib is a single facet.
While this is a fairly easy task (particularly if the blank was cut out well), be certain to keep an eye on the nib to ensure that it is properly formed. Ideally, each facet should be perpendicular to the sides of the handle and of the same length. Perpendicularity can be checked with a square, or by sight. The small facets make any deviation readily apparent.
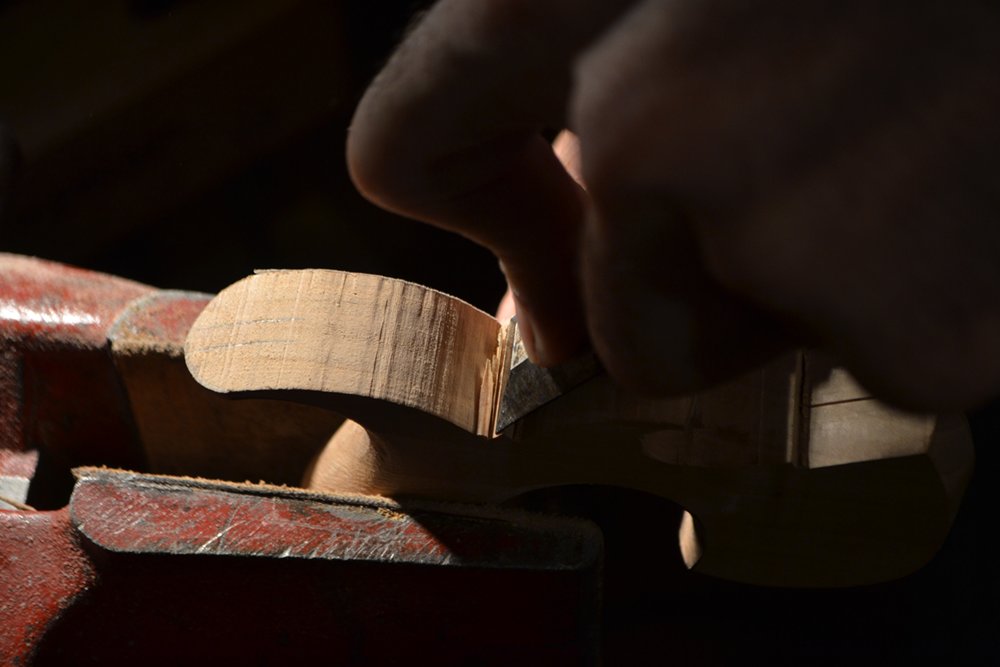
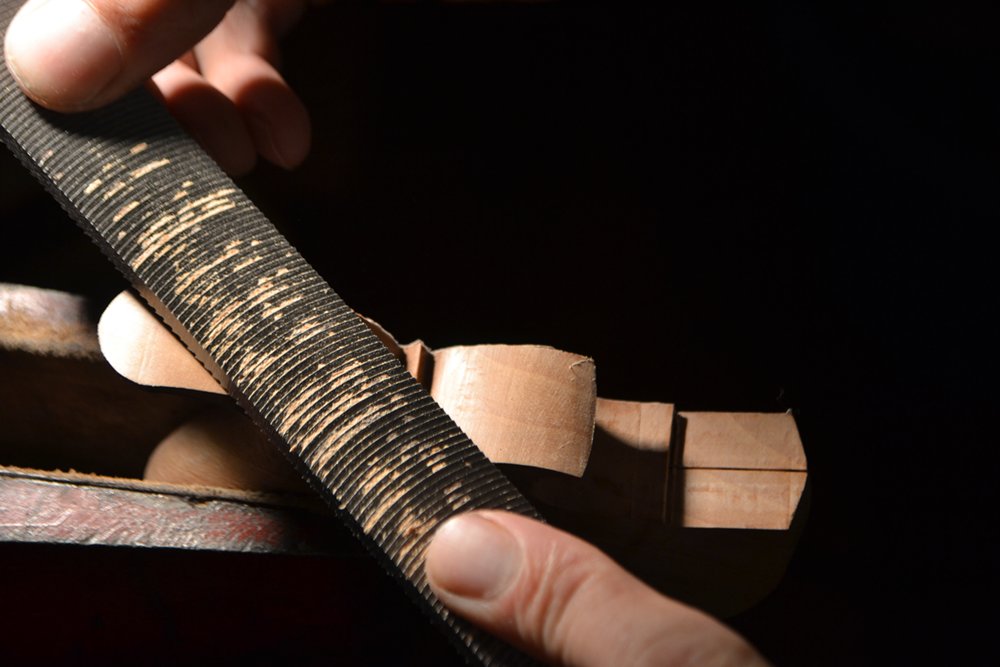
When the nibs are finished, I begin to smooth the outside surfaces of the horn and beak. This is all done with a Vixen file. The areas just in front of and behind the nib must be filed straight across the grain, a risky proposition. Use a light touch and keep most of the pressure on the trailing edge of the file, so as to not chip out the wood on the unsupported side. File from both directions to avoid removing removing excess material from one side. Small chips that will not disappear when the edge is rounded over may be reapired with CA glue.
Filing across the grain. It’s really the only way to smooth this area, but it does require a deft touch to avoid spelching.
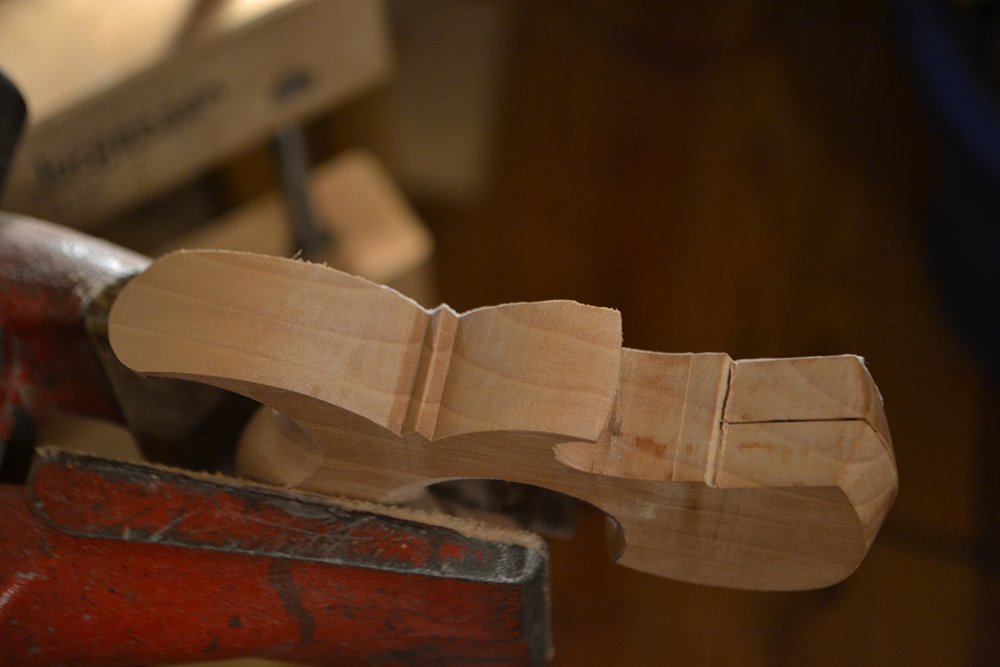
After cleaning up those areas, the rest of the horn and beak can be cleaned up by skewing the Vixen file and filing with the grain. While doing all of this, stop frequently to feel and look at the curves to ensure that they are fair and that the surface remains perpendicular to the sides
Smooth the remainder of the horn and beak by skewing the file and working with the grain.
The nib and horns on the bottom of the handle are cleaned up in an identical manner.
The nib and outer surfaces of the horn and beak being smoothed, we now turn our attention to the inside of the beak.
Finally, it is time to smooth the inner surface of the beak, which I do by wrapping a dowel in sandpaper and working it back and forth. Ideally, the dowel should be sized so that it just fits into the beak when the sandpaper is rolled around it. Keep the sandpaper moving from front to back so that the transition between the circular portion of the beak and the curve that ramps downward remains smooth.
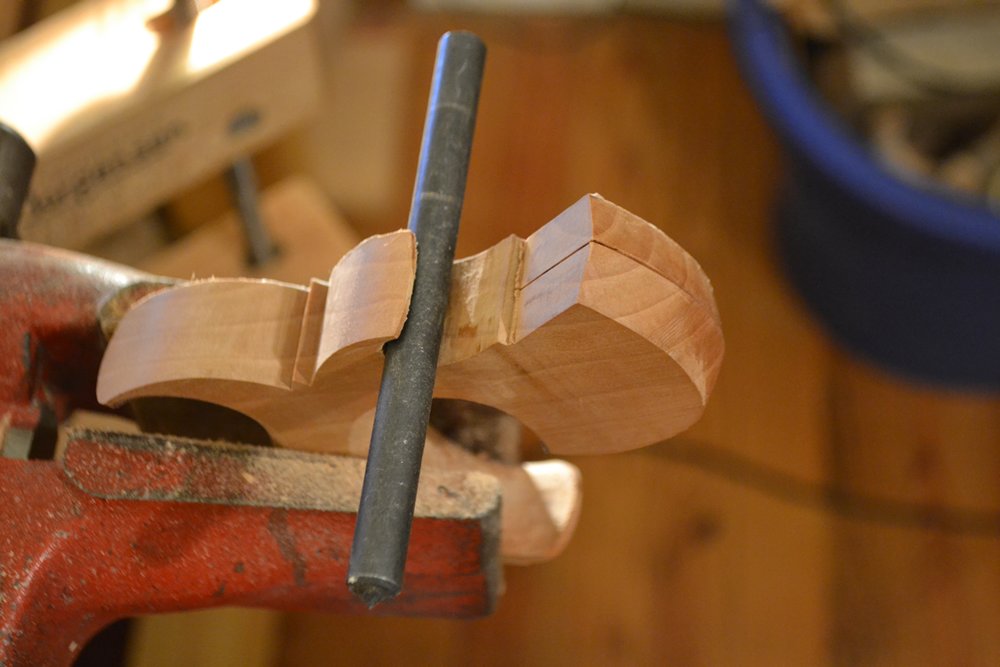
The steel dowel (actually a center punch) that I use.
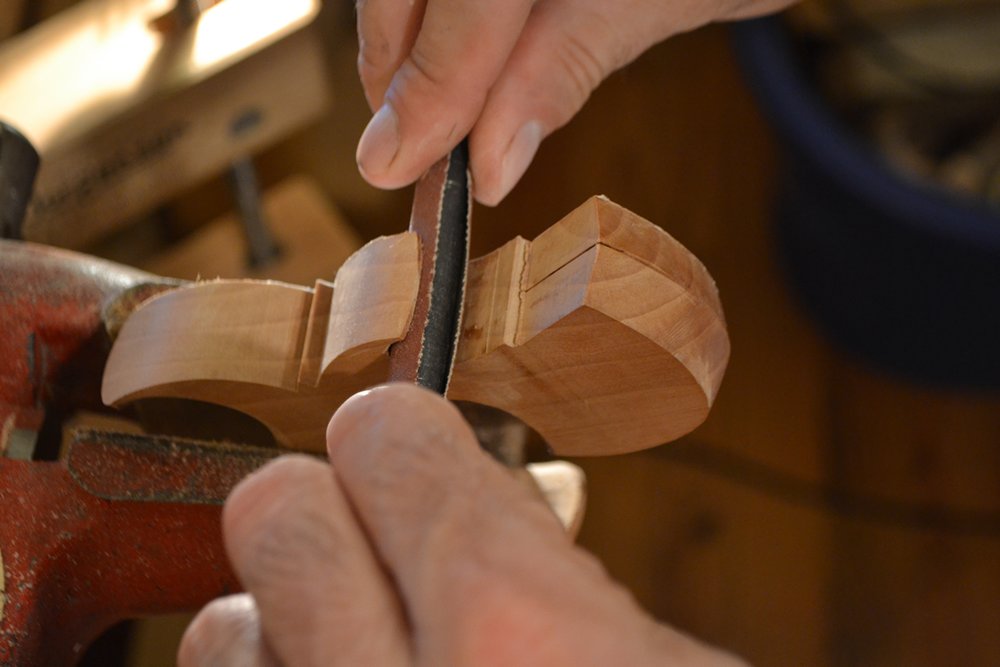
Sanding the beak.
Next up: Letting, or mortising, the spine into the handle.