
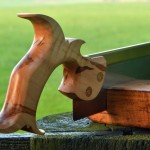
Even plain apple is an attractive wood, but this particular piece has a lot going on. With so much character, it may not be for everyone, but I find it rather striking.
Ten inch dovetail saw with brass spine and bolts and apple handle.
Even plain apple is an attractive wood, but this particular piece has a lot going on. With so much character, it may not be for everyone, but I find it rather striking.


Ten inch dovetail saw with brass spine and bolts and apple handle.
I recently wrote a short entry on saw handle hang angles in which I alluded to providing a more technical analysis of the topic. After a few late nights, that analysis is ready to present in this post. This will be a bit more technical than the first one, and possibly of even less general interest.
If there is one concept that is drilled into the head of every engineering student, it is that the solution of any problem begins with the construction of a free body diagram that clearly shows all of the forces and their locations. The validity of the solution depends on the accuracy of this diagram.
The free body diagram of a backsaw is the starting point of this analysis. The remainder of it is largely a more rigorous confirmation of what was already covered in the first post. The major difference is the inclusion of the weight of the saw in the analysis. While this does not change our original findings, it does provide a third principle to take away from this mathematical exercise.*
This principle being that, as the weight of a saw increases, the teeth “bite” more deeply into the wood, allowing a greater proportion of the sawyer’s thrust to be directed parallel to the toothline (and less of it downward) by lowering the hang angle of the handle.
To avoid rendering issues, the free body diagram and its solution are presented in the following pdf file:
*In the event that you do not recall, or did not read (and who can blame you), the first two principles enumerated in the initial post, they are repeated below. -Ed.
“The first principle being that a saw with a higher hang angle will necessitate either adopting a more upright stance, lowering your work, angling the toe of the saw up, or some combination thereof. This assumes you are interested in the proper mechanics of sawing.
The second principle being that, ceteris paribus, as the hang angle increases, the rake angle needs to be relaxed to avoid difficulty in starting and catching in the middle of the stroke. This effect is much greater in rip saws than in crosscut saws.”
**A reader pointed out a mistake in the original version of this pdf. It has since been corrected. In the second to last paragraph, the first sentence began “Seeing that Fc can be …”. Fc has been replaced with Fb. -Ed., 30 April 2014
For reasons not entirely clear to me, American beech, one of my favorite domestic woods, is often looked down on. No doubt this disdain stems in part, or largely, from its wide use in cheap or second-rate tools, where it is often stained or painted in an attempt to conceal its plainsawn grain.
Perhaps that plainsawn figure is the real reason for its reputation. Unlike woods whose figure is less dependent on grain orientation, beech’s appearance is entirely dependent upon how it is sawn. Looking at quartersawn and plainsawn beech samples side by side, it would be easy to believe that they are two entirely different species. Plainsawn samples are boring and somewhat unattractive, but turn that same wood 90 degrees and it comes to life, with golden flecks and rays set against a cream or pinkish background.
Although larger manufacturers cannot individually select each piece of wood to ensure that this figure is prominently featured, the best toolmakers (most notably planemakers) go to great pains to do so. The reward for this effort is well worth it.

Ten inch dovetail saw with canted blade. Handle in quartersawn American beech.

Ten inch dovetail saw with canted blade. Handle in quartersawn American beech.

Ten inch dovetail saw with canted blade. Handle in quartersawn American beech.

Ten inch dovetail saw with canted blade. Handle in quartersawn American beech.
This is the sixteenth entry in a nineteen part series that covers the construction of one of my saws from start to finish. For links to the other entries, please see the full chronological index. -Ed.
Fitting the back & blade
As I mentioned in my last post, the blades are held in their backs by friction that is generated by squeezing the slots closed. The back’s hold on the blade can be incredibly tenacious, capable of rendering its removal nearly impossible. For this reason, all shaping and test fitting of the parts is done before joining the back and blade.
The two parts are assembled by driving the back onto the blade with a cast iron hammer with wood faces. The blade is clamped tightly between two pieces of wood, leaving just enough of the blade exposed so that the back can be seated. I use paper between the wood and the blade to help prevent scratching.
Before installing the back on the blade, I run a feeler gauge through the slot to ensure that no debris is trapped within. Any material there can prevent the blade from fully seating, leading to either a crooked back or warped blade.
I start by tapping the handle end of the back onto the blade, then check to ensure that it is properly positioned (from front to back) before proceeding further. Adjustments are very difficult to make when the back is further installed.
I continue to work down the back, always striking behind the point where the blade enters the back. When needed, I hold the free end of the back so that the slot remains aligned with the blade as it enters the slot. The rounded edge that was filed on the back of the blade also helps guide the blade into the slot.

The tools and setup.

Starting at the handle end of the spine.

Beginning to work forward…

…and continuing to work forward.

Always strike the back behind the entry point of the blade, or bad things will happen.
When the whole length of the blade has entered the slot, I begin working back and forth to ensure that the entire length of the blade is seated to the full depth of the slot. It is easy to see when the ends are fully seated; the middle can be checked by sighting along the back or with a straightedge.
If the blade is fully seated in the middle, but not at the ends, you will notice bowing, or oil-canning, at the toothline. If the bow pops to the other direction when you push on the convex side, the toothline of the blade is in compression. This can be remedied by driving the ends of the back further onto the blade or by driving the center of the back off of the blade. If neither of these helps, there is little choice but to remove the back and try again. Likewise, any wrinkles near the back necessitate removal and reinstallation of the back.
It is common for the blade to have some twist in it, and this will be removed in the next step. For now, consider any blade that is installed without oil-canning or wrinkles a success.

The back fully seated on the blade.
This is the fifteenth entry in a nineteen part series that covers the construction of one of my saws from start to finish. For links to the other entries, please see the full chronological index. -Ed.
Debluing & deburring the blade
The spring steel I use is blued to help prevent rust. While I think that a blued blade would look very attractive on the right saw, the bluing is not abrasion resistant and would highlight every scratch and scuff acquired over its lifetime. For this reason, I choose to deblue the blade.
My first efforts at debluing included the use of citric acid and vinegar. Soaking the blade in either one of these for 10 or 15 minutes removes most of the bluing, leaving a thin film that I removed with a Scotch-Brite pad or a deburring wheel.*
Then, one day while soldering some parts, I noticed the flux that I was using had dripped onto some blued steel, leaving it shiny. A little research revealed that the flux contained hydrochloric acid. Thinking this might be a better way of debluing the blades, I bought a bottle of muriatic acid from the hardware store.
The results were spectacular. Simply wiping the blade with a rag dampened with muriatic acid was enough to completely remove every trace of bluing and leave a bright finish. The steel does need to be rinsed in water (within seconds) and oiled immediately afterwards to prevent rust and corrosion from forming. This, to me, is a small price to pay for the time and mess that were associated with using vinegar.
I have since learned that others use phosphoric acid, and with similar results. If you decide to try either of these methods, please do so with great caution. Use them only in a well-ventilated area, and with the proper personal protection (gloves, goggles, old clothes, etc.).

Debluing the blade with muriatic acid. Because this is a staged photo, I am not wearing any gloves.
For a more consistent satin finish, I turn once more to the deburring wheel.

Deburring the blade, with a backer board to keep even pressure on the steel.

Finish after debluing on the top; after deburring on the bottom.
*If you use vinegar or citric acid to deblue steel, first wash off any oil with dish soap. Failure to do so will result in uneven removal of the bluing. -Ed.
This is the fourteenth entry in a nineteen part series that covers the construction of one of my saws from start to finish. For links to the other entries, please see the full chronological index. -Ed.
For another method of closing the slot, please see this later post. The method described therein requires less specialized equipment. -Ed.
Stamping & closing the slot
To stamp the back, I use a maker’s stamp from Infinity Stamps. This one cost nearly $200 several years ago, but was worth every penny. The quality is exquisite, and their service was outstanding.
The stamp can be either struck or pressed. For consistency, I use a hydraulic press and a jig to hold the back and the stamp.
Several sharp-eyed readers have noticed that the following pictures are not of the back we have been following in previous posts. That back called in sick on the day we were shooting, so this one was used as a stand-in. -Ed.

The stamp and the back, with a 4 inch square for scale.

The back and the stamp in the jig.

Pressing the stamp.

The freshly minted stamp.
There are many ways to attach the back to the blade. Others who build with slotted spines use Loc-Tite, epoxy, screws, or rivets; my blades and backs are held together by friction. To create this friction, I spring the slot by squeezing the back in my hydraulic press. With the proper application of force, the width of the slot will be reduced by a few thousandths of an inch at the edge. It does not sound like much, but it is enough to grip the blade with enough force that separating the two is a non-trivial matter.

The jig I use to squeeze the slot in the back.

Squeezing the slot in the press.
This is the thirteenth entry in a nineteen part series that covers the construction of one of my saws from start to finish. For links to the other entries, please see the full chronological index. -Ed.
Sanding & deburring the back
The back being fully shaped and cut to length, it needs a bit of sanding and polishing before assembly. I do most of the sanding with 220 or 240 grit cloth-backed sandpaper , and always sand parallel to the length of the back. I sand wet, with a bit of dish soap added to the water, which seems to keep the paper from clogging so quickly. If there is a deep scratch or dent, I carefully file it out rather than trying to sand it down.
Sanding the lamb’s tongue is a little finicky, but by curling the sandpaper to fit into the curves, it is possible to maintain the lines and chamfers. With any luck, the file work was accurate and smooth, and does not need much work.
When the back is fully sanded, I run it across a deburring wheel. This removes many of the scratches from sanding and leaves an attractive satin finish.

Begin by sanding with 220 or 240 grit sandpaper.

“Polish” the back with a deburring wheel.

Deburred section on the left; sanded section on the right.
This is a long and semi-technical post; thankfully, if that sort of thing bores you, the author has included a brief summary at the end, which he offers up as an escape from the tedium of reading through most of what follows. That warning dispensed with, let the brave continue reading. -Ed.
Even if you don’t know what it is, the hang angle of a saw is one of its most important characteristics. Without knowing why, you may find some of your saws to be naturally more comfortable than the others; there is a good chance that this saw’s hang closely fits your sawing mechanics.
What exactly, you ask, is hang? And why does it matter?
Oh, am I glad you asked. No, really, I am. Most people clutch their children and back out of the room when I start talking about hanging my saws, so having a willing listener is a pleasant, albeit novel, experience.
Although there is an increasing awareness of the importance of the hang angle, very few saw makers even mention it, and then only in passing and with no specific numbers offered up. Because of this, there is no precisely defined manner of measuring hang, so let us define it as the angle that is formed between the toothline and a line drawn perpendicular to the back of the handle.
Figure 1 shows two saws at the extreme ends of the size and hang spectra. In general, the hang angles of saws decrease as the lengths are increased. Canting the saw plate, as in the 19 inch Kenyon tenon saw shown below, can have an effect on the hang angle as we have defined it, but this effect is usually minor. I will address these points in future posts.

Figure 1. Showing two of the extremes in hang angles.
Now let us consider the two backsaws shown in Figure 2, which are identical in every feature and measurement, save for the hang angle (the same lessons and conclusions can also be applied to handsaws). It should be noted that the hangs of these two saws are exaggerated to more clearly show the effects of changing it.

Figure 2. Two carcase saws, identical except for the hang angles.
First consider the effect of hang on your stance while you are sawing. The proper stance is one in which your wrist is aligned with your forearm; when thus aligned, little stress is placed on your joints, and the saw feels like an extension of your arm. Figures 3-6 show proper and improper stances for two very different saws. Because of differing hang angles, a stance that is uncomfortable for one saw may feel right for another. In the pictures below, my right arm is at my side so that my left arm and the saws are visible; while actually sawing my right hand is placed on the work next to the saw.

Figure 3. Showing poor form while using a 28 inch miter box saw with low hang. The elbow is too high, cocking the wrist upwards.

Figure 4. Showing good form while using a 28 inch miter box saw with low hang. The elbow has been lowered by crouching slightly and leaning forward, bringing the forearm into alignment with the wrist.

Figure 5. Showing poor form while using a small patternmaker’s saw with high hang. Because of the hang, the elbow is now too low, cocking the wrist downwards.

Figure 6. Showing better form while using a small patternmaker’s saw with high hang. The elbow has been raised by standing more upright, bringing the forearm into alignment with the wrist. In practice, I prefer to lean forward and crouch as shown in Figure 5, then angle the toe of the saw upwards and/or lower the work. I find that this engages more of the lower body, increasing power, balance, accuracy, and comfort.
The preceding pictures show how proper stance is in part dictated by the hang angle of a saw. Hang can be further compensated for by adjusting the height of the work and angling the toe of the saw. If holding the saw correctly leaves you bending over more than you find comfortable, it can be remedied by some combination of raising your work and tilting the toe of the saw downwards. If you feel too upright, apply the opposite remedies.

Figure 7. Whether you lean into your work while sawing, or prefer a more gentlemanly one, finding a saw with a hang angle that is comfortable for you will make your work more pleasant.
Having examined the effect that the hang angle of your handle has on your sawing mechanics and work positioning, we turn to its effect on the saw’s teeth. If you are not filing your own saws, this may be of limited interest to you, although it never hurts to understand how your tools work.
In looking at this effect, we will assume that the force applied by the sawyer’s arm coincides with the line used to calculate the hang, and that the magnitude of the applied force is independent of the hang angle. This is technically incorrect because of the way your closed hand grasps the handle. We will also neglect the weight of the saw. While these assumptions, particularly the latter, do have an effect on how the saw cuts, they simplify the following diagrams without changing the qualitative conclusions. To prevent this post from becoming too lengthy and technical, I reserve a more rigorous analysis which considers them for a later date. [This more rigorous analysis has now been posted. -Ed.]
If your high school physics is a touch musty, the following review of forces may be helpful. It looks a little technical, but understanding this makes it very easy to see the effects of hang on a saw. If you are one of those nerdy engineers, skip the review and try not to be bothered by the simplifications. We are looking at concepts, and trying to reach qualitative, not quantitative, conclusions.
Force (in this case, the thrust you supply to the saw) is a vector quantity, meaning it has both magnitude and direction. When needed, we can separate a force vector into two distinct components that are right angles to each other. In this case, we shall call one component horizontal and the other vertical. In Figure 8 and the diagrams below, each force and its components are proportional to the lengths of the arrows by which they are represented.

Figure 8. Our two carcase saws, showing their hang angles and the directions in which the force is applied by the sawyer. The force applied to each saw is identical, but the horizontal and vertical components differ in magnitude.
Comparing the two saws, it is evident that a greater proportion of the applied force is directed horizontally in the saw with low hang. Inversely, the saw with higher hang directs more of its applied force vertically.
Next, let us examine Figure 9 to see what happens when these forces reach the teeth that are engaged in cutting. Assume that the force applied to the handle is evenly distributed between each of these teeth, and that the forces at the tips are in the same directions and proportions as that which is applied to the handle. We denote the forces at the tip with an “f” to distinguish them from the force applied to the handle, which are denoted with an “F”.

Figure 9. Our two carcase saws, showing the forces at the tips of their teeth.
As Figure 9 shows, the teeth on the saw with the higher hang, being driven with a greater downward force, will bite more deeply into the wood. As anyone who has used a plane or scraper knows, the force required to sever a shaving from its parent board increases with the rankness of the cut. From this, we can reason that the saw with the higher hang will require more applied force, or thrust, to both start and keep it cutting.
We would be remiss if we did not pause to briefly describe saw teeth and how they cut. The teeth shown in Figures 9 and 10 are filed rip, and cut very differently from crosscut teeth. Whereas the pointed tips of crosscut teeth (which typically have rake angles ranging from 10 to 20 degrees) cut with a slicing action, rip teeth act as small scrapers (if this difference needs more explanation, feel free to brush up on tooth geometry).
In practice, the slicing action and relatively relaxed rake of crosscut teeth means that crosscut saws are not nearly as sensitive to changes in hang angles as rip saws (the effect on body mechanics does still apply).
Most who have picked up a rip saw, particularly one with aggressive teeth, have experienced difficulty in starting the saw, or in keeping the saw moving without grabbing. The typical solutions offered are to refile the teeth with more rake or to lessen the force on the teeth by “lifting” the toe of the saw, thereby relieving some of the weight or vertical force on the teeth. The astute reader will note that reducing the hang angle has the same effect; unfortunately, few saws have that capability, so short of buying a different saw, the solution lies within the first two options.

Figure 10.* By increasing, or relaxing, the rake, a thinner shaving is taken, requiring less force to push the saw.
[*Figure 10 has been corrected – the bottom caption wrongly said “lower rake angles”; the correct caption is “higher rake angles”. -Ed.]
What, then, is the point of studying the effect of hang angles? If you are buying an upper end saw, it may be of little practical use, as the filer should have taken the hang angle of the saw and its intended uses into account when sharpening it. If you sharpen your own saws, it is worthwhile to remember that more highly hung saws may benefit from comparatively relaxed rake angles.
A brief summary
If perusing this post made you a little drowsy, and you have no interest in rereading it, there are two main points which I hope you will take with you as you search for and use your saws. Knowing these two principles, you can understand and use hang angles to your advantage, rather than reacting blindly to them.
The first principle being that a saw with a higher hang angle will necessitate either adopting a more upright stance, lowering your work, angling the toe of the saw up, or some combination thereof. This assumes you are interested in the proper mechanics of sawing.
The second principle being that, ceteris paribus, as the hang angle increases, the rake angle needs to be relaxed to avoid difficulty in starting and catching in the middle of the stroke. This effect is much greater in rip saws than in crosscut saws.
Although one can arrive at these same conclusions by trial and error, the path is more easily navigated when it is lit by knowledge of the principles which govern the work. And with a little good fortune, this illumination often reveals hitherto hidden trails to explore.
If you believe I have made any errors, either technical or conceptual, please leave a comment so that we can discuss it.
This is the twelfth entry in a nineteen part series that covers the construction of one of my saws from start to finish. For links to the other entries, please see the full chronological index. -Ed.
Shaping the back (spine)
We will start with a slotted spine. I have briefly covered my slotting setup in previous posts, and will go into more detail in the future.
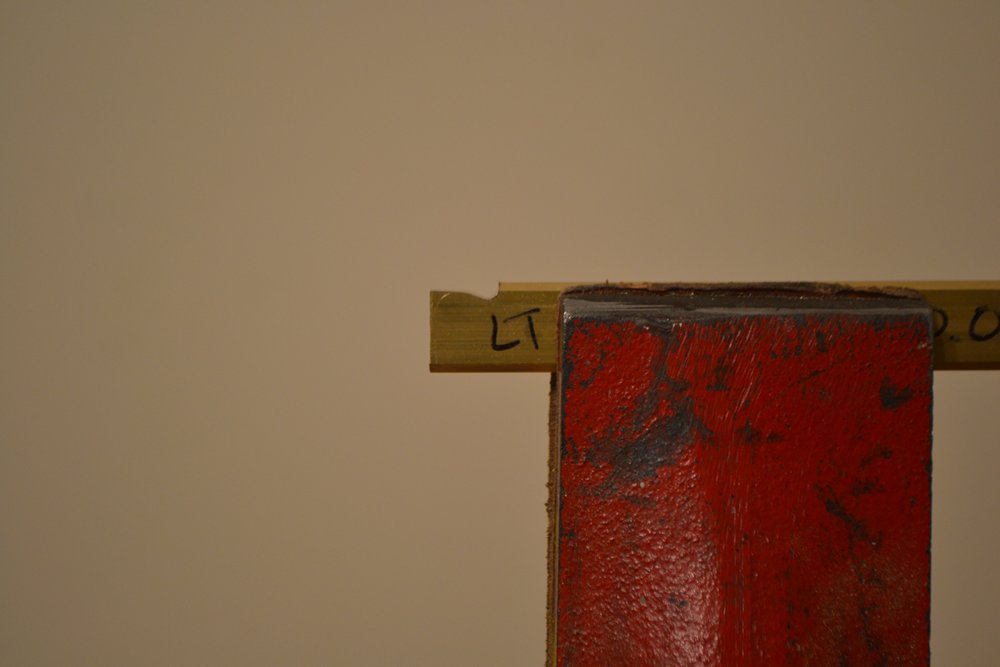
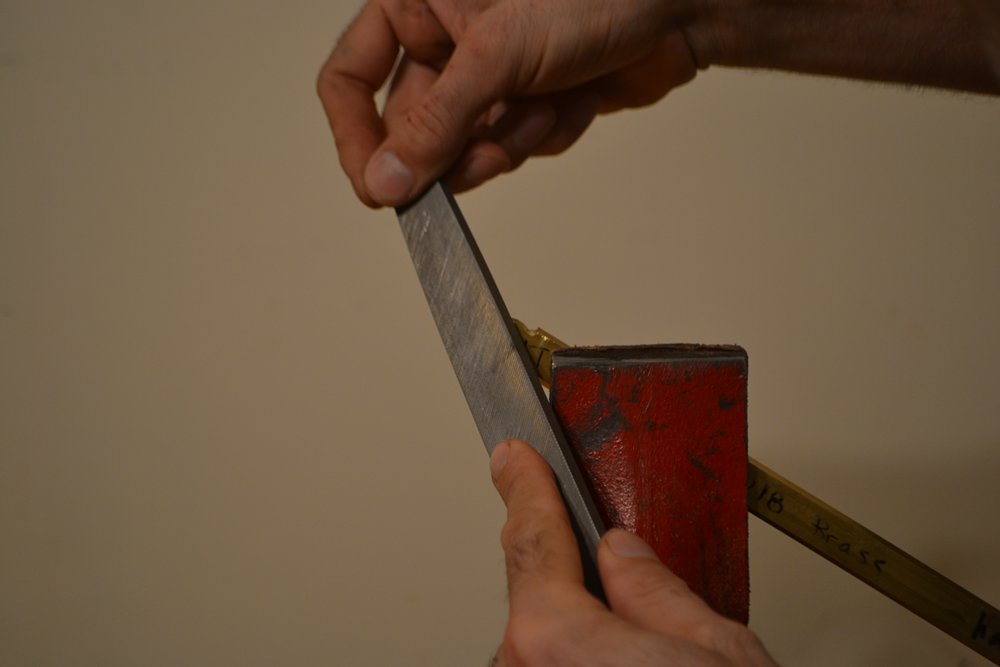
At this point, the back is simply a length of brass or bronze bar with a slot cut into it. The first refinement is chamfering all four corners. I have tried this on my milling attachment, but it is both slow and inaccurate. Every little variation and twist in the bar shows up in the chamfer, so my current method is to file them by hand.
By setting the vise to 45 degrees, the chamfers will be at the same angle when I hold the file horizontal. All of the work is done by eye, with no layout lines. With chamfers this small, variations in width are easy to see.

Tilt the vise so that the jaws hold the back at 45 degrees.

Hogging off material with a large file.

Smooth the chamfer with a finer file (this is a lathe mill file).

If the chamfers are even, the slot will be centered on the flat edge.

All four corners chamfered.
Although the lamb’s tongue on the end of the back is an optional detail, most of my customers like it enough to order it. I am sometimes surprised that a detail that arose from covering up a mistake has become somewhat of a signature on my saws.
The lamb’s tongue is not difficult to make, but does require a bit of care and a steady hand to execute. As with so many other details, it is helpful to examine it from many angles to ensure that the lines look correct from all of them.

This is the template I use for the lamb’s tongue detail on the end of the back. It is made from spring steel, and was cut with the same files I will use to shape the brass.

Scribe the layout line.

The files I use, from top to bottom: lathe mill file, chainsaw file, and three-square needle file.

Showing the layout line.

Cut to the line with the chainsaw file.

Use the lathe mill file to shape the rest of the curve. This file has safe edges, which makes filing the point of inflection a little easier.
More work with the lathe mill file.

Still more work with the lathe mill file.

And yet more work with it…

…until the profile is shaped.

A quick check from various vantage points to ensure the curve is perpendicular to the sides.

Begin filing the chamfer on the concave portion of the curve with the chainsaw file.

File the convex portions of the curve with the lathe mill file. I don’t show the three-square file in use, but it works well in this area to clean up any little imperfections.
This is the easy part of the chamfer.

The completed chamfer. It should be a consistent width or thickness as it follows the curve.

Check from this angle (and from the top) for consistency. The slot needs to be centered on the flat section, and the chamfers need to be a consistent width as they follow the curves.
Only after successfully shaping the lamb’s tongue do I trim the back to its final length. This gives me an opportunity to correct a mistake by beginning anew on the detail.

Slip the blade into the spine, then place them into the handle.

Measure the amount that needs to be trimmed from the other end. Remember that the back should overhang the blade by about 1/16″, so the length to be trimmed is about 1/16″ less than the current overhang.

Transfer this measurement to the other end of the back.

Scribe a cutoff line.

Cut to length with a hacksaw.

Clean the cut and deburr with a file.
Finally, I stamp each back with its serial number.

Stamp the serial number into the end, where it will be hidden inside the handle.
This is the eleventh entry in a nineteen part series that covers the construction of one of my saws from start to finish. For links to the other entries, please see the full chronological index. -Ed.
Cutting the blank
***When working with spring steel, it pays to be careful. The edges can be very sharp, and wearing eye protection and gloves when handling it is highly recommended.***
My blades are made from polished and blue tempered 1095 spring steel, hardened to Rc 48-51. It is available from any number of suppliers, and is sold in various thicknesses and sheet sizes. I buy it in rolls that range from 10 to 25 feet in length.

Roll of 1095 spring steel, as received.
After uncoiling the steel, I place tape where I will cut, then mark the lines on that with a pen. All of the cuts are made with a Beverly shear, first cutting to length and then to width.


Cutting the blanks to length on the Beverly shear.

Cutting the blanks to width.
The shears leave a decent edge, but they do need to be cleaned up with a file. The ends are checked for perpendicularity to the edge that will be the toothline; the backside is checked for straightness. This second step is extremely critical – the edge of the blade that will be installed into the back must be either dead straight or slightly convex. When the back is driven onto the blade, any concavity will result in a bow along the toothline. The edge should also be chamfered or rounded over to make installation in the back easier. Do not, however, form a knife edge, as this can damage the back as it is driven on.
Whenever I hold the blade in a vise, I protect it from scratches with a layer of tape or paper.

Cleaning up the end of the blade.

Checking the end for perpendicularity to what will become the toothline of the blade.

Deburring the edges.

Cleaning up the back edge of the blade. The toothed side will be addressed when I sharpen the blade.

Checking the back of the blade for straightness. Err on the side of convexity, as any concavity will bow the blade when it is installed.

Chamfer or round over the edges. The edge should be blunt, not sharp, so that it slips into the slot without catching and marring the brass back.
Finally, the back end of the blade must be clipped to fit in the handle. I seat the blade fully into the back, then slide it into the handle as far as it will go, making sure to keep the back parallel to the top of the mortise. After taking the measurements, they are transferred to the saw blade itself, which is then cut and deburred with a file.

Clean any chips or debris out of the slot so that the blade will fully seat in it.

Slip the blade fully into the slot, then slide the assembly into the handle. Push the blade as far back as it will go into the handle, then check that the back is parallel to the top/open edge of the mortise.

Measure the distance from the bottom of the blade to the end of the slot in the handle.

Measure the distance from the back edge of the blade to the end of the slot in the handle.

Transfer the first measurement to the blade.

Transfer the second measurement to the blade.

Connect the two measurements.

If the measurements were accurate, trimming to this angle will seat the blade properly in the handle, providing a little extra protection against slipping.

Trim the back edge with the shears.
Next up: shaping the back, a most exciting endeavor.